Help Center
How to Set Up, Use, and Share Student Accounts
DCMP makes it easy to set up accounts for students, including a tool to Create Multiple Student Accounts and a training video.

K-12 students under 18 years of age are currently not eligible for their own DCMP membership. However, adult members can create Student Accounts for them. This provides a student with his or her own username and password, allowing them access to media assigned by the main account holder. (Post-secondary students who are interpreters- or teachers-in-training do qualify for full DCMP membership.)
Each Student Account can be shared among educators and parents who have a DCMP account. Members can also create Classes, or groups, of students to more easily manage the assigning of media permissions.
Student Accounts are restricted DCMP accounts designed for direct use by your students in the classroom or at home and are not full-featured accounts. They are not linked to an email address. Therefore, password management is the responsibility of the teacher or parent managing the Student Account. After setting up accounts and setting permissions, you may give your students their login credentials and allow them to use DCMP on their own.
- Creating Student Accounts
- Deleting and Reactivating Student Accounts
- Creating a Class for a Group of Students
- Assigning Media to a Student or Class
- Sharing Student Accounts
- Video Tutorial
Creating Student Accounts
Log in to your DCMP account. Once your login is successful, you will see your account page.
Click on the "Account" button in the upper right-hand part of your screen. From the dropdown menu, select "Students."

Select "New Student" or, if you wish to create several student accounts at once, click "Create Multiple Students."
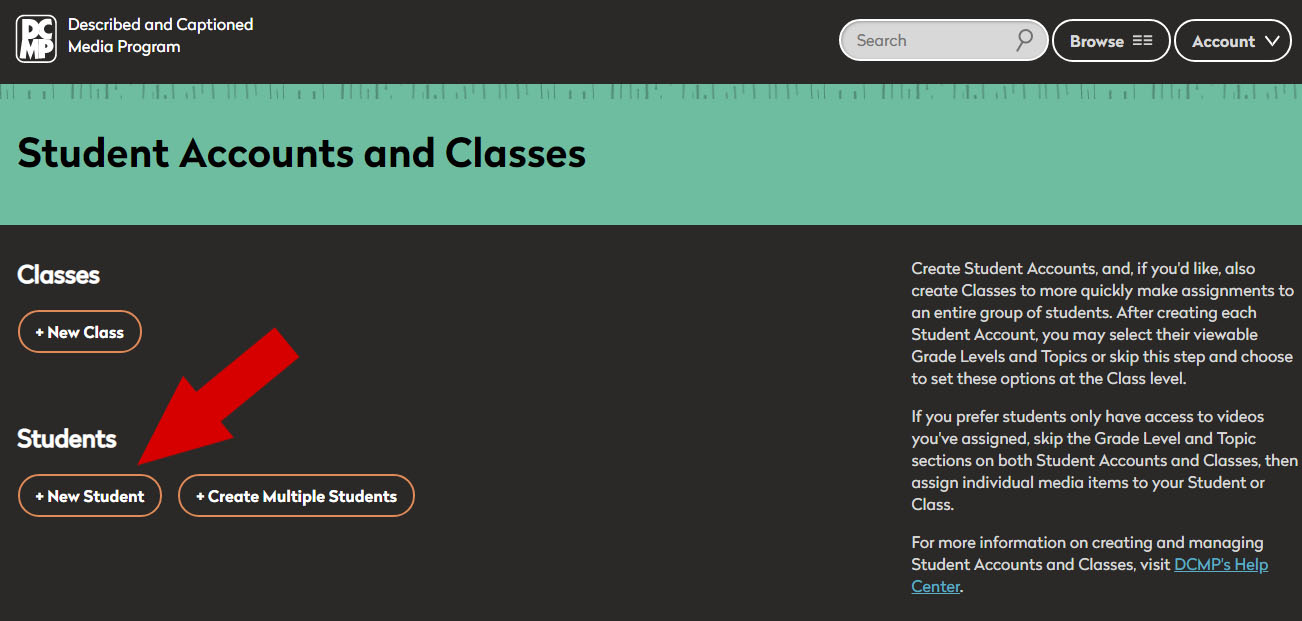
Skip to the next step if you are creating multiple student accounts.
Create Single Student Account:
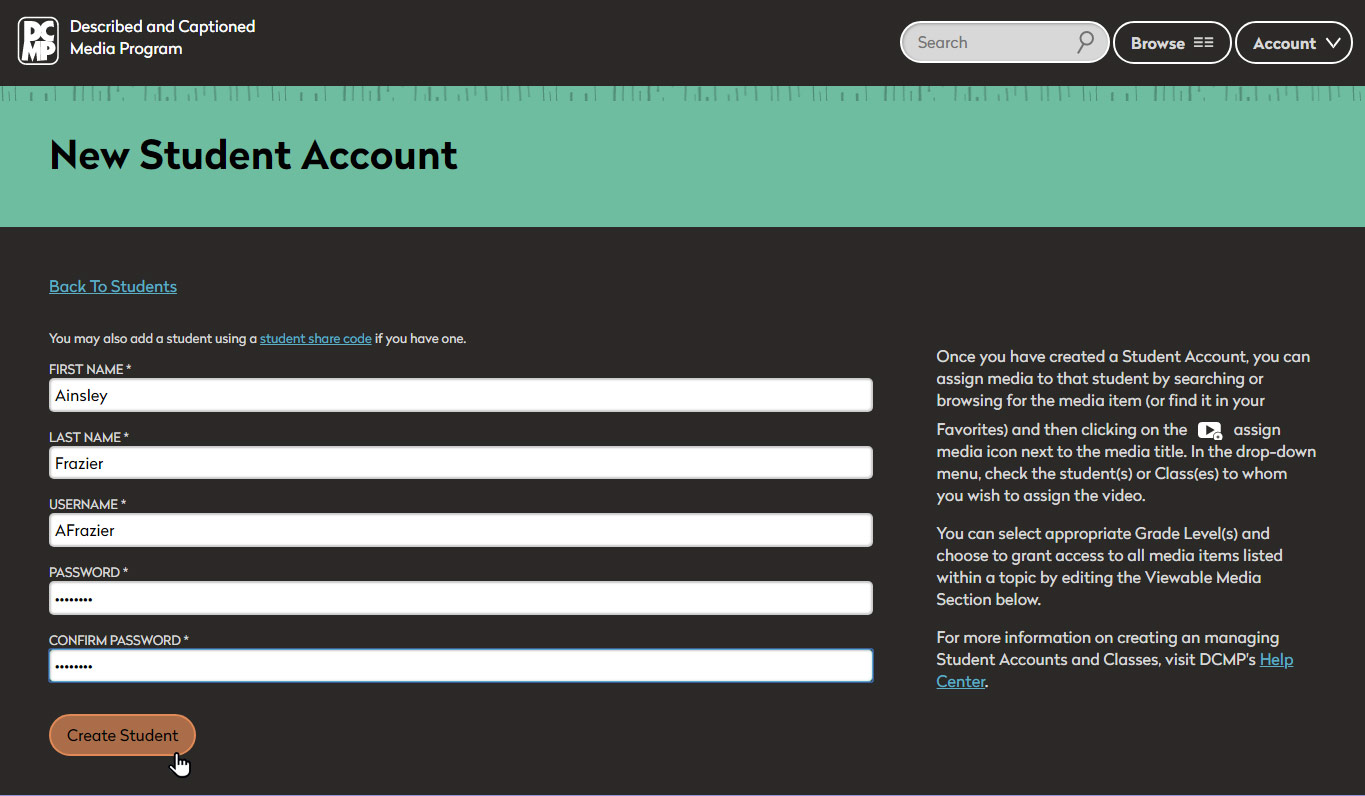
Enter your student's first name, last name, a username of your choice, and a password. Then click "Create Student." (Or click here if someone is sharing a Student Account with you.)
You'll see the message, "Student Account Created," and a prompt to set the grade level and viewable media for the student(s). Click the button or you can come back and do this later.

Select one or more appropriate grade levels for your student. When your student is browsing or viewing media, this will restrict what they are able to see. Click "Save."

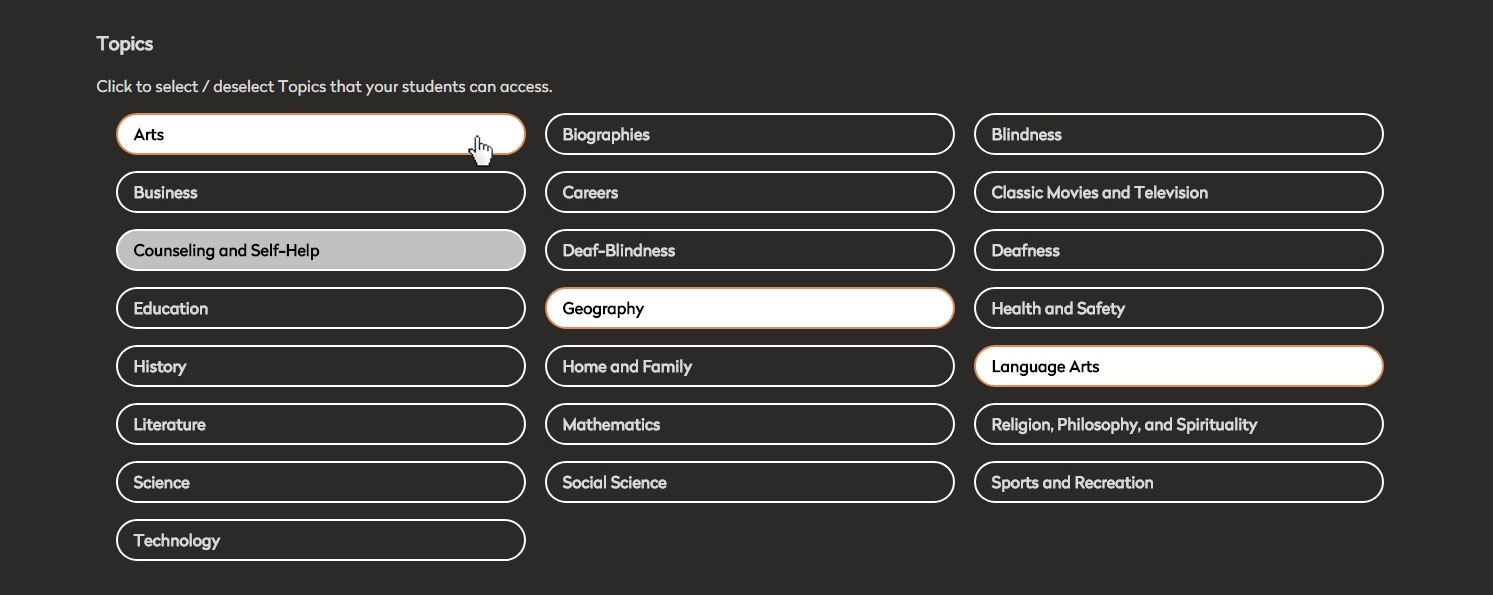
Select the topic areas that your student will have access to when browsing.
Note that assigning a topic gives permissions to all subjects and titles within that particular topic, under that student's grade level.
Create Multiple Student Accounts:
Select "Create Multiple Students."
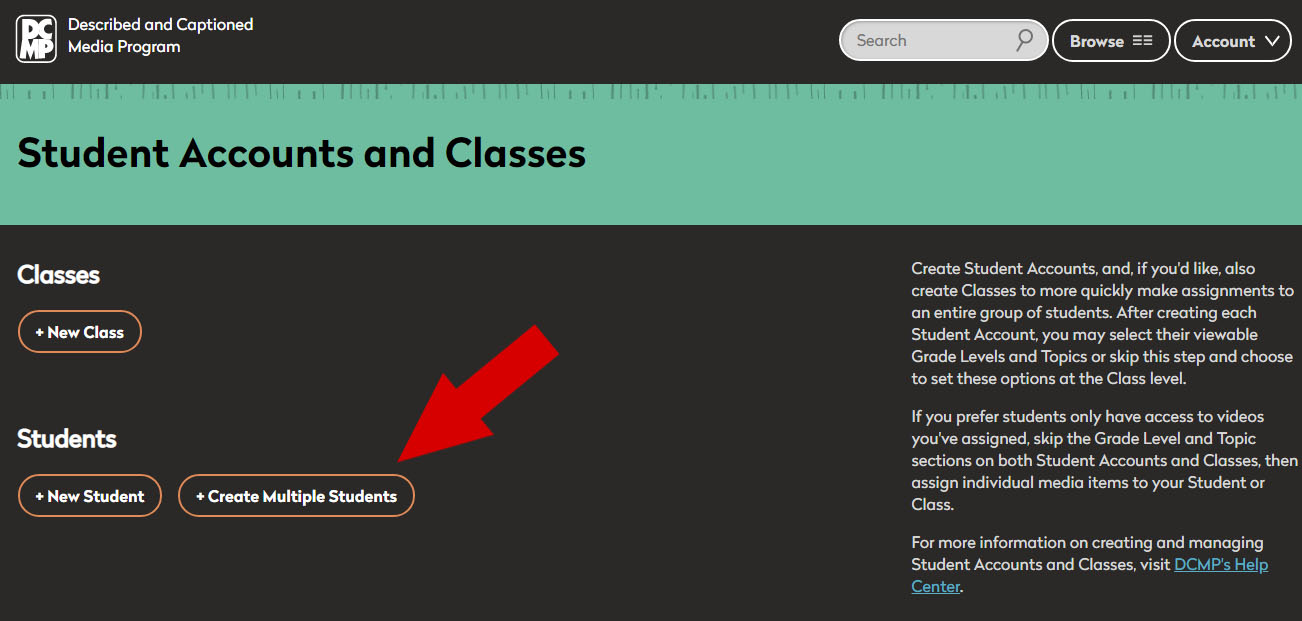
There are two methods for entering students' names:
- Enter your students' names one at a time and hit "enter" or click "add." A username and password will be generated automatically for each student. You may change these; the system will display a red "X" if the username or password is already in use.
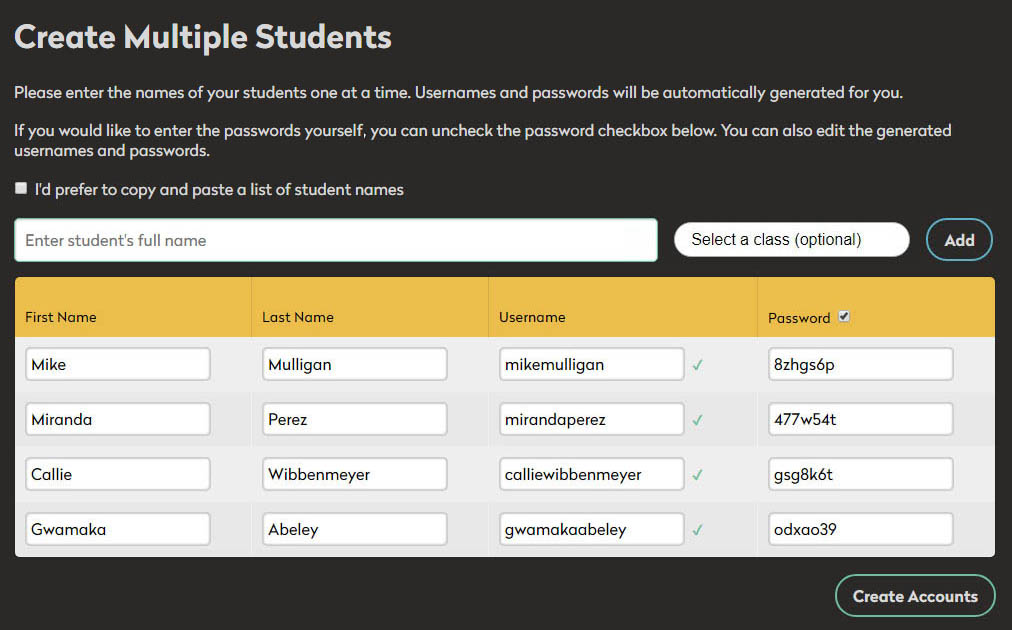 If you have already created a Class, or group, of students, you can select it while creating this list to automatically add these students. Otherwise, you can create a new Class later to add students and assign grade levels and media. Scroll down to find instructions for creating Classes.
- You may copy and paste a list of students' names. This can come from a text document or spreadsheet. If you use a web-based teaching platform like Google Classroom or Moodle, or a student administration system like PowerSchool, you may be able to export your roster as a CSV or text file, then copy/paste to create multiple students. The key is to have one student per line.
Check the box for "I'd prefer to copy and paste a list of student names" and paste your list. Usernames and passwords will be generated automatically and can be edited.
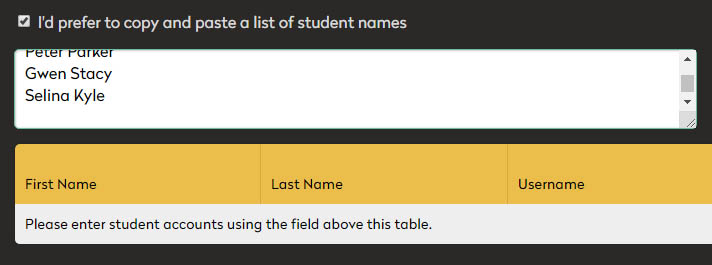 Supported formats are:
- First name, space, last name
- First name, tab, last name
- Last name, comma, space, first name
If you have already created a Class, or group, of students, you can select it while creating this list to automatically add these students. Otherwise, you can create a new Class later to add students and assign grade levels and media. Scroll down to find instructions for creating Classes.
When you have entered all the student names, click "Add" and then "Create Accounts." Now you can download or print a listing of the accounts and passwords you have created.
IMPORTANT: You must download or print the list of accounts and passwords at this time. The option will not be available later because no one, even DCMP staff, has access to user passwords. Forgotten student passwords cannot be reset.

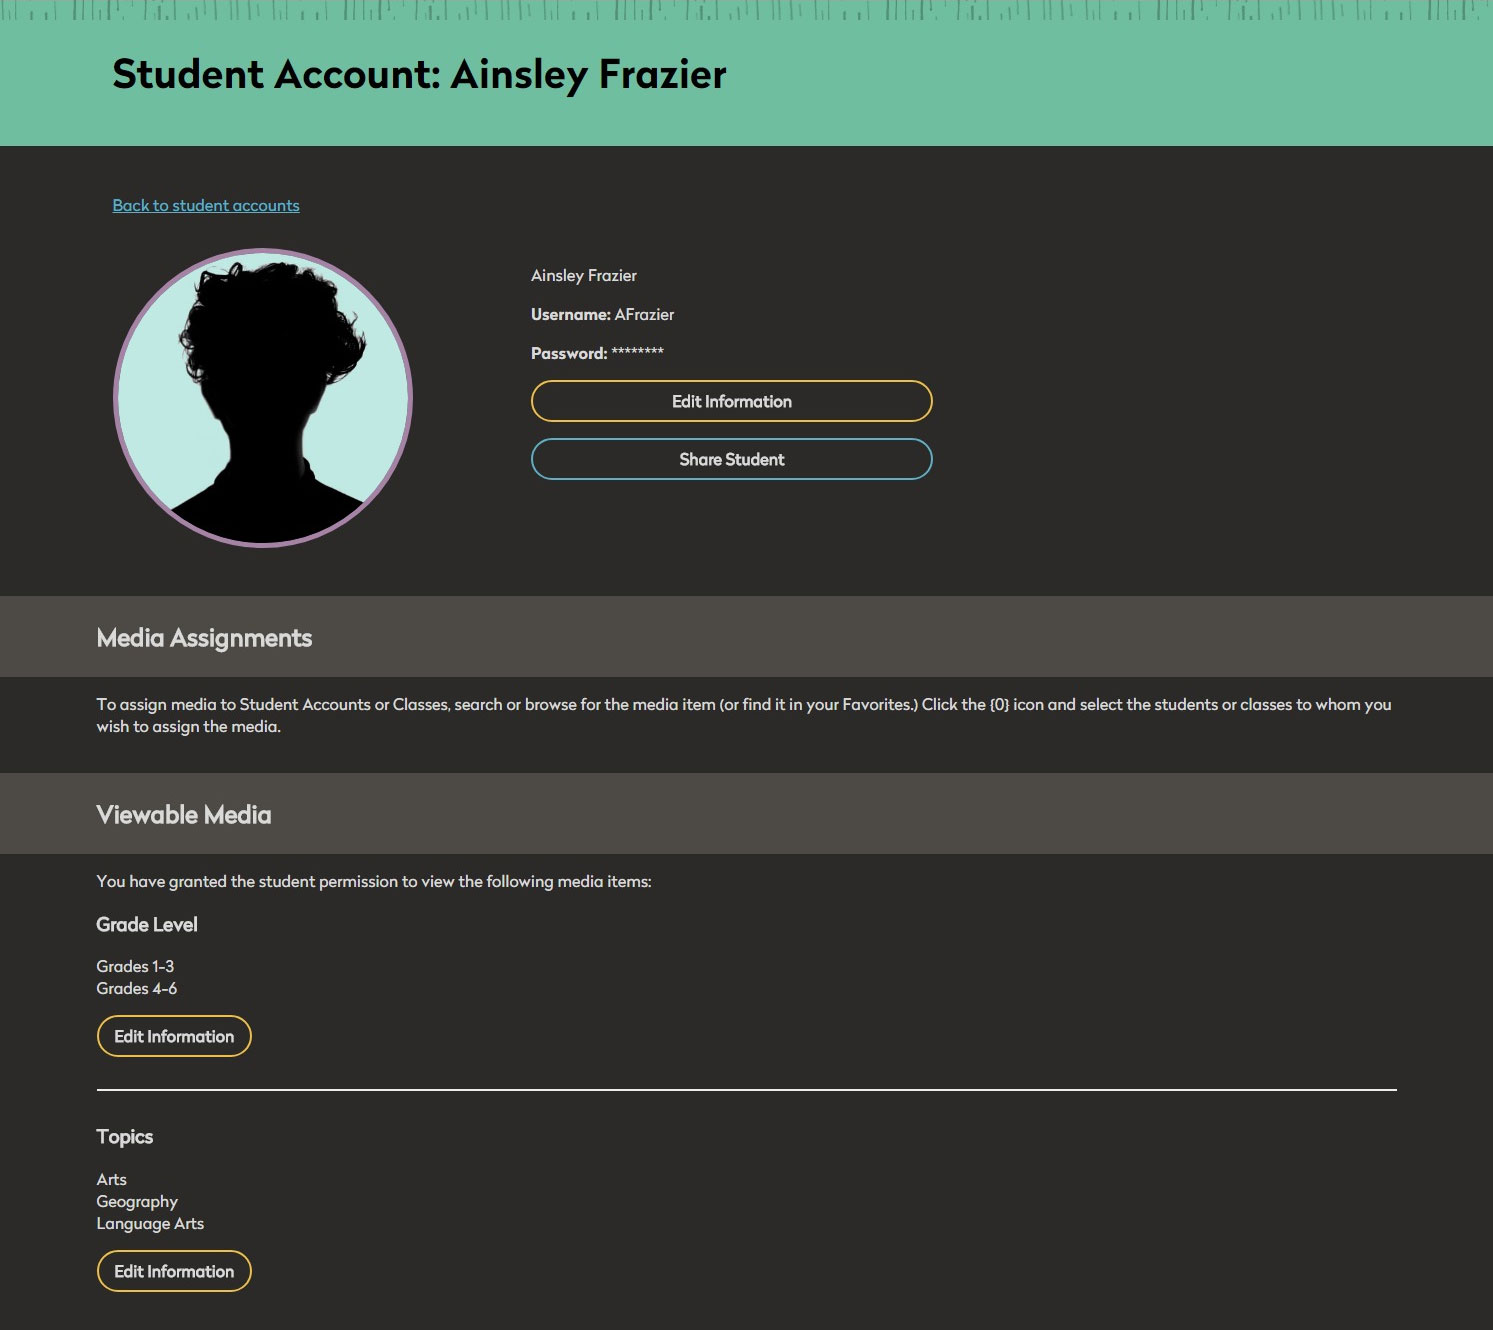
You'll be able to see each student's account information, media assignments, and viewable media.
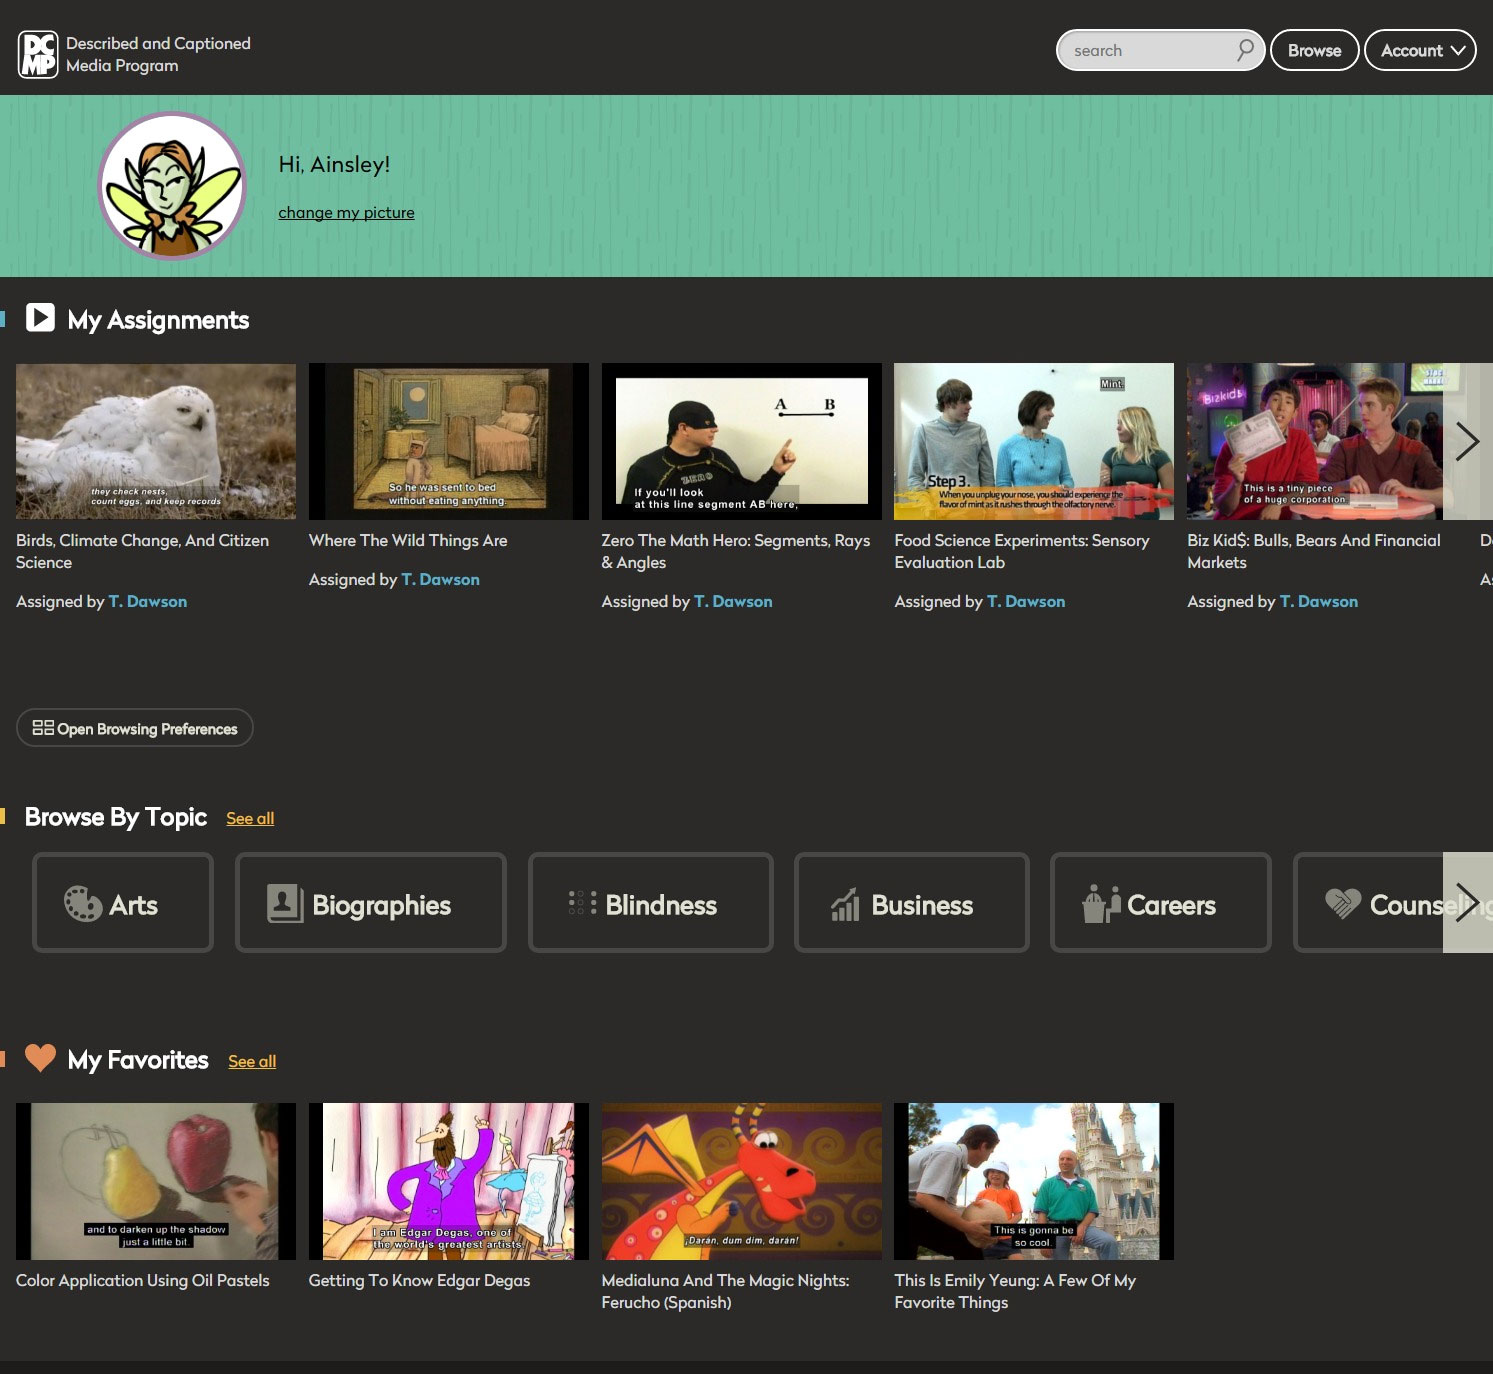
Each student for whom you create a Student Account can now go to dcmp.org and log in with their username and password. This will take them to their DCMP account page where they will be able to select an avatar, see their assigned videos, and browse videos under the topics for which you've given them permission.
Deleting and Reactivating Student Accounts
When transitioning to a new school year, you can easily delete Student Accounts for former students. You can also recover deleted Student Accounts. Deleted Student Accounts are archived and can be reactivated later if needed.
Delete Student Accounts one at a time by clicking the "Remove" button next to the student, or delete several accounts at once by checking the box next to each student and then clicking the "Delete selected students" button.
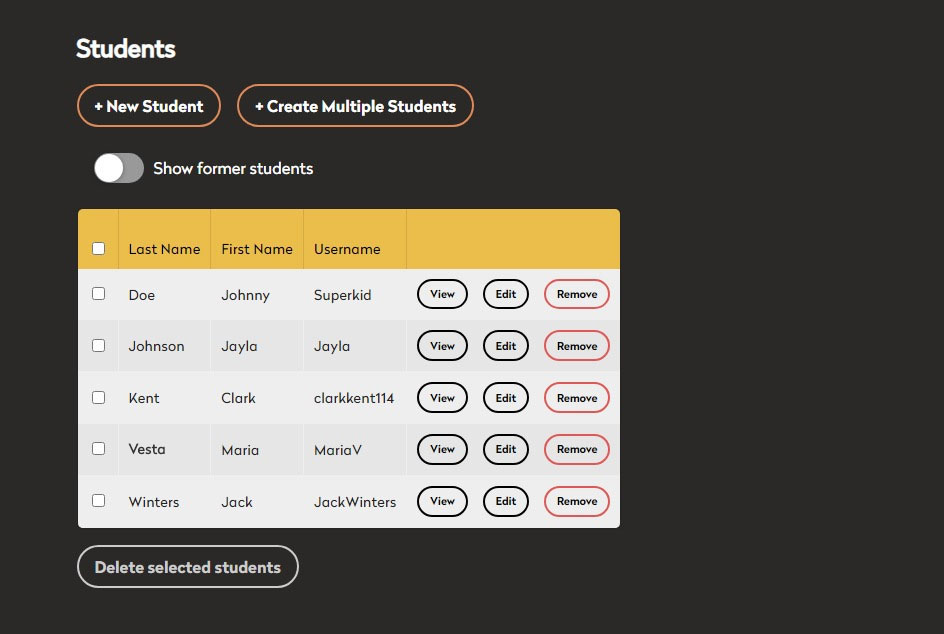
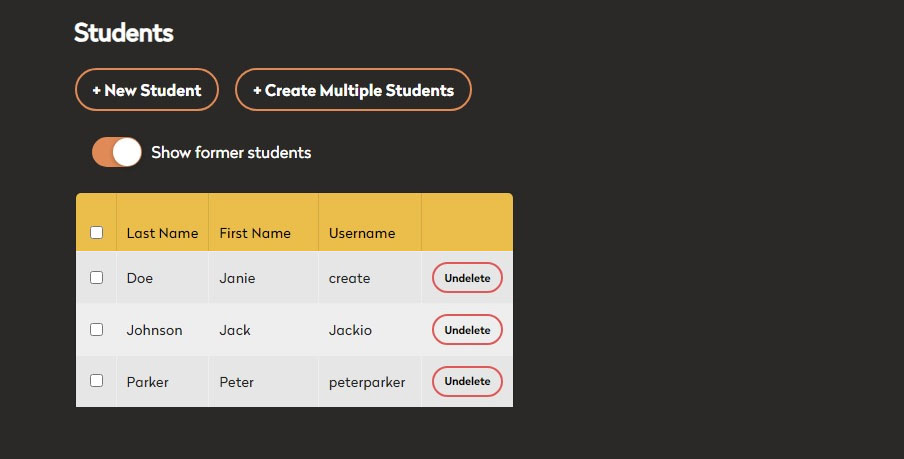
To reactivate deleted Student Accounts, toggle the button for "Show former students." Then click the "Undelete" button to reactivate the Student Account.
Creating a Class for a Group of Students
Once you have created student accounts, you can set grade levels, select topics, and assign media to groups rather than to individual students if you choose.
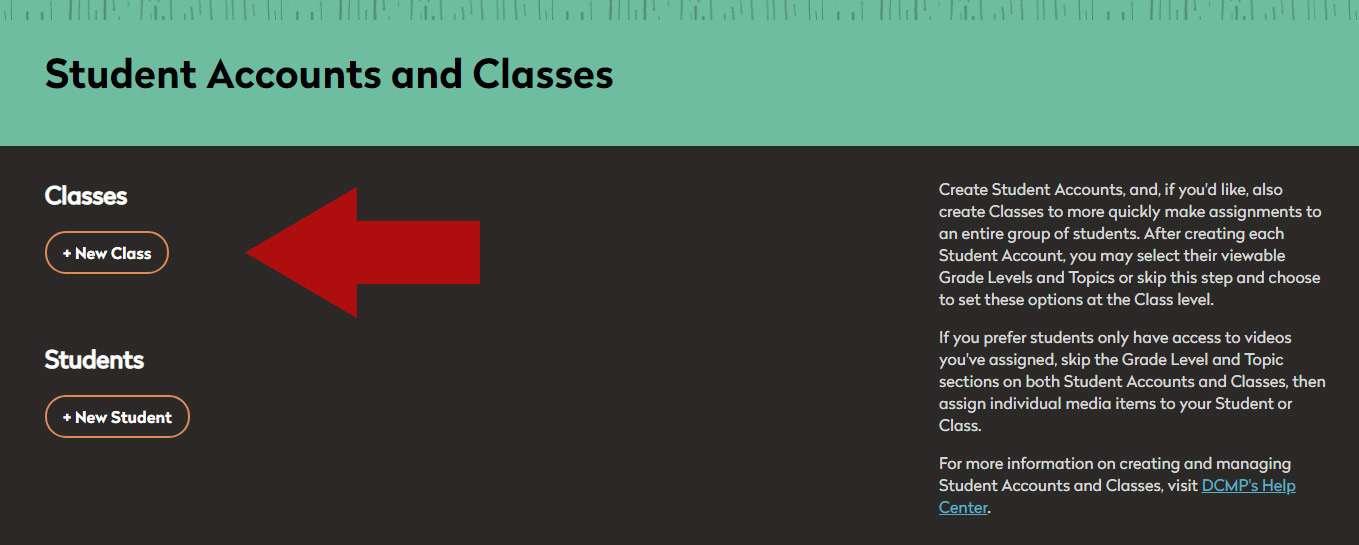
Log in and click the "Accounts" button at the top of the page. Select the "Students" button.”

Select "New Class."
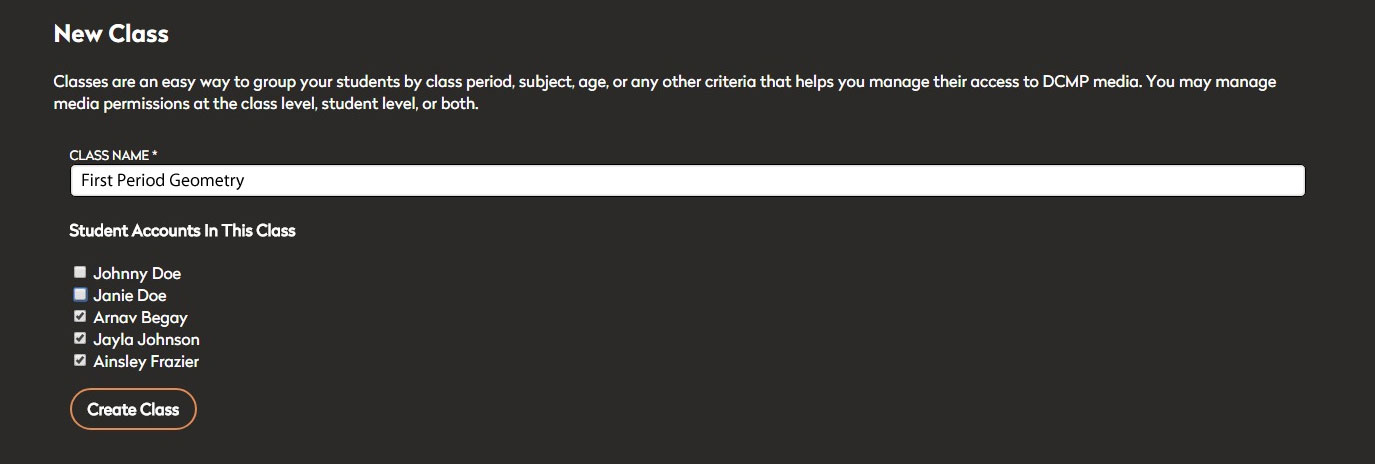
Give the class a name, and select the students who will be in this group.
Set the grade level(s) for the class. The students who are in this group will be restricted to browsing the media based on your selection. Click "Save."
Set topics for the class. The students who are in this group will be restricted to browsing the media based on your selection.
Assigning Media to a Student or Class
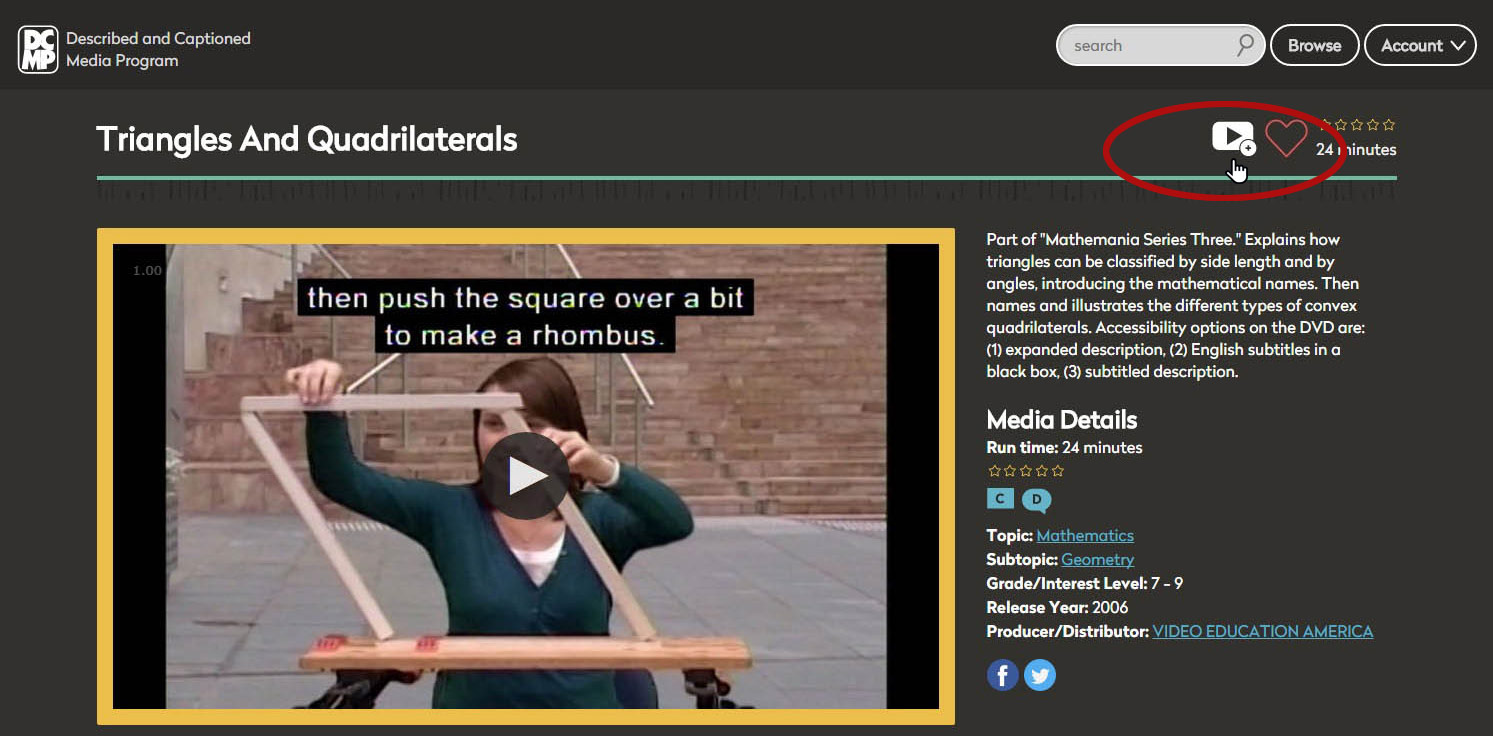
You can assign media to a student or class by searching or browsing for the media item (or find it in your Favorites) and then clicking on the icon next to the media title.
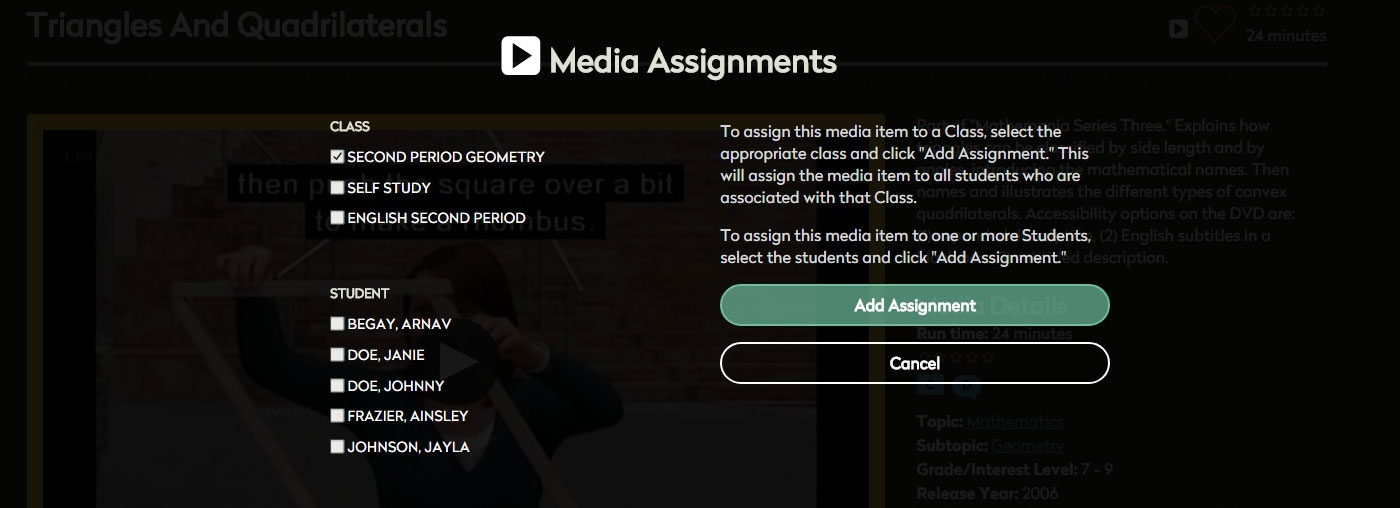
When the Media Assignments window opens, select the students or groups for which you’d like to assign permission to the topic. After making your selections, click “Save Changes.” This process can be repeated for any topic, subject, or individual title you choose.
Students will see their assignments and Topics browsing permissions on their account page each time they log in to dcmp.org with their username and password. Clicking the "Account" button takes them to their main account page.

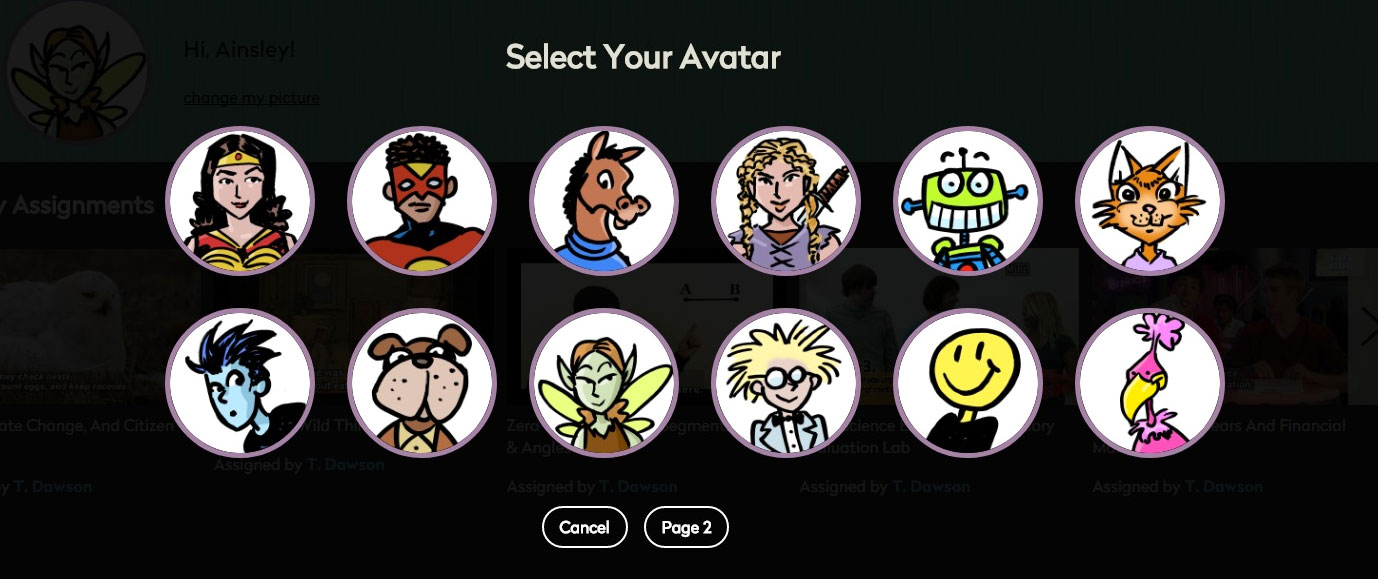
When students log in to their account, they can customize their account by choosing an avatar. On their account page, under the existing avatar is a link to change the avatar. Unlike primary DCMP members, students cannot upload a photograph or other image to use for their avatar.
Sharing Student Accounts
Sharing student accounts with other DCMP members who are associated with your student means that students, school personnel, and parents forego the hassle of having to manage multiple accounts for one student. Sharing a student account allows you to manage only those assignments and permissions that are relevant to your lesson plan, while allowing others to independently assign media to the same student.
To share a student account:
Log in and click on the "Account" button at the top of the page.
Select "Students" from the dropdown menu.
Select the student account you wish to share. Click the "Share Student" button.

Clicking the "Share Student" button will generate a share code that is and will remain unique to that student. You can print out or email the code to share it with another DCMP member.
If a DCMP member has shared a student account with you:
Log in and click the "Accounts" button at the top of the page.
Select "Students" from the dropdown menu.

Click "New Student."

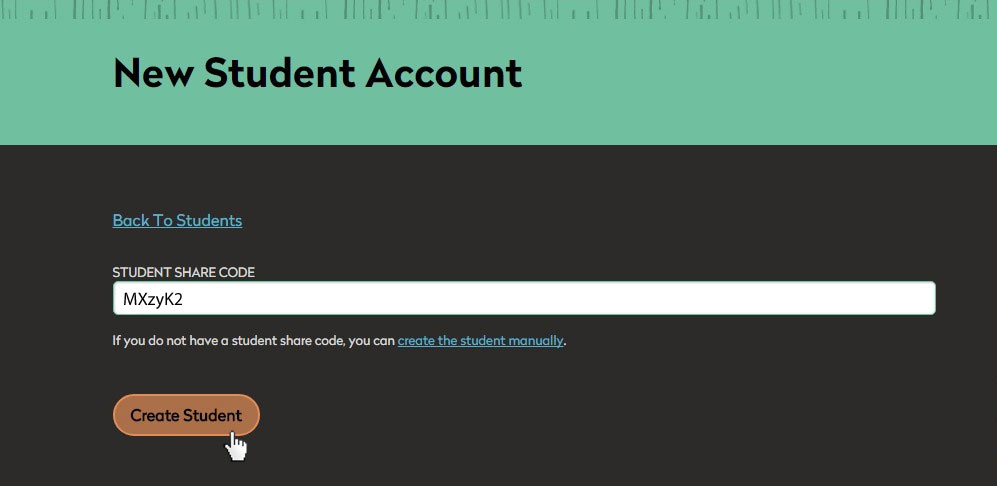
Instead of entering the student's name, username, and password, click on "You may also add a student using a student share code if you have one."
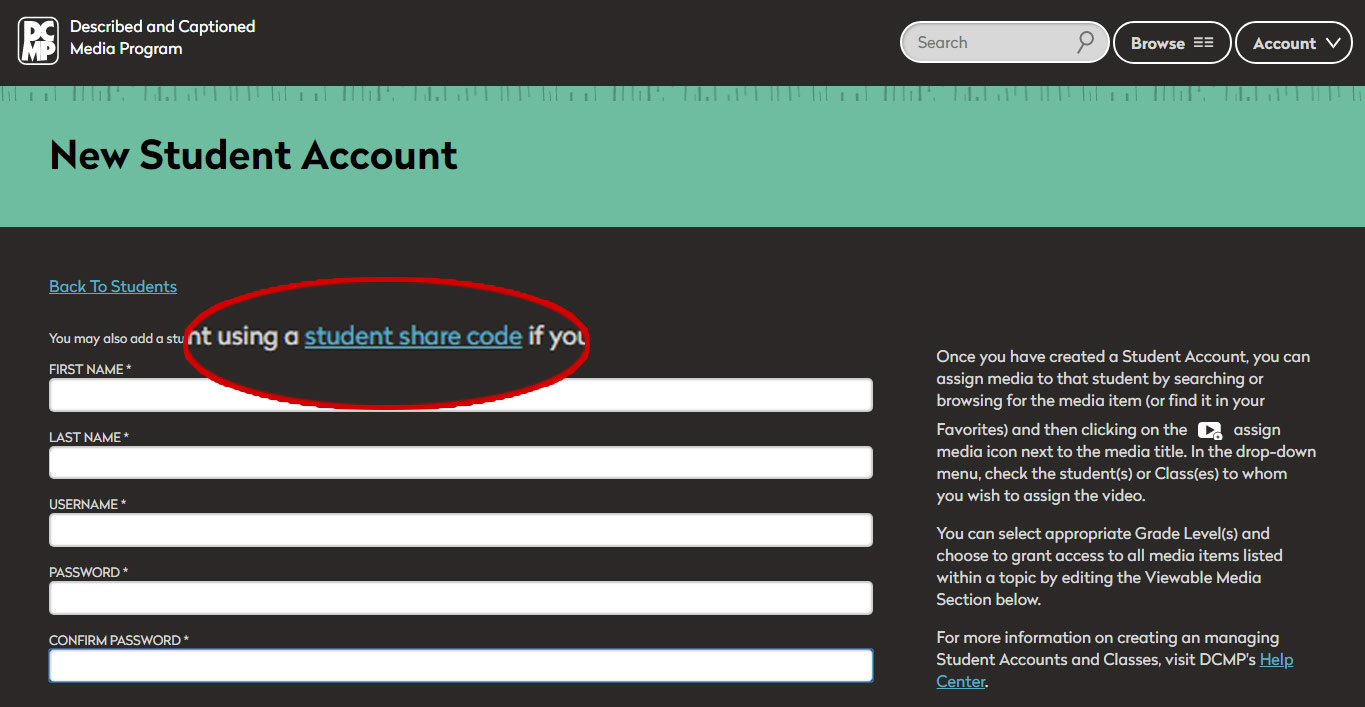
Enter the student share code that you received from the other DCMP member. The student's existing account information will automatically be added to your account.
You'll see the message, "Student Account Created," and a prompt to set the grade level and viewable media for this student. Click the button or you can come back and do this later.

Select one or more appropriate grade levels for your student. When you student is browsing or viewing media, this will restrict what he or she is able to see. Click "Save."

Select the topic areas that your student will have access to when browsing.
Note that assigning a topic gives permissions to all subjects and titles under that particular topic.

You'll be able to see each student's account information, media assignments, and viewable media.

Repeat this process for each of your students.
You can now Create a Class for a group of students, assign media to a student or class, and share student accounts with other teachers and parents.
Each student for whom you create a Student Account can now go to dcmp.org and log in with their username and password. This will take them to their DCMP account page where they will be able to select an avatar, see their assigned videos, and browse videos under the topics for which you've given them permission. They can always get back to their account page by clicking the "Account" button at the top of the screen.

Video Tutorial
Click here to view the video tutorial for creating and managing Student Accounts and Classes.
If you have questions, please email us at support@dcmp.org.
Tags:
